

Simple Storage Service (S3)
Introduction
Section titled “Introduction”Simple Storage Service (S3) is an object storage service that provides a highly scalable and durable solution for storing and retrieving data. In S3, a bucket represents a directory, while an object corresponds to a file. Each object or file within S3 encompasses essential attributes such as a unique key denoting its name, the actual content it holds, a version ID for versioning support, and accompanying metadata. S3 can store unlimited objects, allowing you to store, retrieve, and manage your data in a highly adaptable and reliable manner.
LocalStack allows you to use the S3 APIs in your local environment to create new buckets, manage your S3 objects, and test your S3 configurations locally. The supported APIs are available on the API coverage section for S3 and S3 Control, which provides information on the extent of S3’s integration with LocalStack.
Getting started
Section titled “Getting started”This guide is designed for users new to S3 and assumes basic knowledge of the AWS CLI and our awslocal wrapper script.
Start your LocalStack container using your preferred method. We will demonstrate how you can create an S3 bucket, manage S3 objects, and generate pre-signed URLs for S3 objects.
Create an S3 bucket
Section titled “Create an S3 bucket”You can create an S3 bucket using the CreateBucket API.
Run the following command to create an S3 bucket named sample-bucket:
awslocal s3api create-bucket --bucket sample-bucketYou can list your S3 buckets using the ListBuckets API.
Run the following command to list your S3 buckets:
awslocal s3api list-buckets{ "Buckets": [ { "Name": "sample-bucket", "CreationDate": "2023-07-18T06:36:25+00:00" } ], "Owner": { "DisplayName": "webfile", "ID": "75aa57f09aa0c8caeab4f8c24e99d10f8e7faeebf76c078efc7c6caea54ba06a" }}Managing S3 objects
Section titled “Managing S3 objects”To upload a file to your S3 bucket, you can use the PutObject API.
Download a random image from the internet and save it as image.jpg.
Run the following command to upload the file to your S3 bucket:
awslocal s3api put-object \ --bucket sample-bucket \ --key image.jpg \ --body image.jpgYou can list the objects in your S3 bucket using the ListObjects API.
Run the following command to list the objects in your S3 bucket:
awslocal s3api list-objects \ --bucket sample-bucketIf your image has been uploaded successfully, you will see the following output:
{ "Contents": [ { "Key": "image.jpg", "LastModified": "2023-07-18T06:40:07+00:00", "ETag": "\"d41d8cd98f00b204e9800998ecf8427e\"", "Size": 0, "StorageClass": "STANDARD", "Owner": { "DisplayName": "webfile", "ID": "75aa57f09aa0c8caeab4f8c24e99d10f8e7faeebf76c078efc7c6caea54ba06a" } } ]}Run the following command to upload a file named index.html to your S3 bucket:
awslocal s3api put-object --bucket sample-bucket --key index.html --body index.html{ "ETag": "\"d41d8cd98f00b204e9800998ecf8427e\""}Generate a pre-signed URL for S3 object
Section titled “Generate a pre-signed URL for S3 object”You can generate a pre-signed URL for your S3 object using the presign command.
Pre-signed URL allows anyone to retrieve the S3 object with an HTTP GET request.
Run the following command to generate a pre-signed URL for your S3 object:
awslocal s3 presign s3://sample-bucket/image.jpgYou will see a generated pre-signed URL for your S3 object.
You can use curl or wget to retrieve the S3 object using the pre-signed URL.
By default, LocalStack does not validate the signature or the expiration of pre-signed URLs. Check out the Signature validation section to enable it.
Path-Style and Virtual Hosted-Style Requests
Section titled “Path-Style and Virtual Hosted-Style Requests”Similar to AWS, LocalStack categorizes requests as either Path style or Virtual-Hosted style based on the Host header of the request. The following example illustrates this distinction:
http://<bucket-name>.s3.<region>.localhost.localstack.cloud:4566/<key-name> # host-style requesthttp://<bucket-name>.s3.localhost.localstack.cloud:4566/<key-name> # host-style request, region is not mandatory in LocalStackhttp://s3.<region>.localhost.localstack.cloud:4566/<bucket-name>/<key-name> # path-style requesthttp://localhost:4566/<bucket-name>/<key-name> # path-style requestA Virtual-Hosted style request will have the bucket as part of the Host header of your request.
In order for LocalStack to be able to parse the bucket name from your request, your endpoint needs to be prefixed with s3., like s3.localhost.localstack.cloud.
If your endpoint cannot be prefixed with s3., you should configure your SDK to use Path style request instead, and make the bucket part of the path.
By default, most SDKs will try to use Virtual-Hosted style requests and prepend your endpoint with the bucket name.
However, if the endpoint is not prefixed by s3., LocalStack will not be able to understand the request and it will most likely result in an error.
You can either change the endpoint to an S3-specific one, or configure your SDK to use Path style requests instead. Check out our SDK documentation to learn how you can configure AWS SDKs to access LocalStack and S3.
If your endpoint is not prefixed with s3., all requests are treated as Path style requests.
Using the s3.localhost.localstack.cloud endpoint URL is recommended for all requests aimed at S3.
Signature validation
Section titled “Signature validation”Like AWS, S3 in LocalStack can validate the signature of incoming requests and reject requests signed with invalid credentials. Signature validation is disabled by default, so that S3 accepts requests signed with any credentials.
Two independent configuration options control signature validation:
S3_SKIP_SIGNATURE_VALIDATION=0validates pre-signed URLs.S3_VALIDATE_SIGNATURES=1validates regular, SigV4-signed requests.
Credentials
Section titled “Credentials”When signature validation is enabled, requests must be signed with credentials that are valid in LocalStack. The following credentials pass validation:
- Default credentials: the default
testaccess key ID with thetestsecret access key, which works out of the box. - IAM user credentials: access keys created for an IAM user with
CreateAccessKey. Check out the IAM documentation to learn how to create a user and its access keys. - Temporary credentials: credentials returned by the STS
AssumeRoleorGetSessionTokenAPIs, used together with their session token.
For example, after creating a role, you can retrieve temporary credentials for it using the AssumeRole API:
awslocal sts assume-role \ --role-arn arn:aws:iam::000000000000:role/localstack-role \ --role-session-name localstack-session{ "Credentials": { "AccessKeyId": "ACCESS_KEY_ID", "SecretAccessKey": "SECRET_ACCESS_KEY", "SessionToken": "SESSION_TOKEN", "Expiration": "TIMESTAMP" }, ...}Export the returned credentials and use the AWS CLI or your SDK as usual — requests are now signed with the temporary credentials and pass validation:
export AWS_ACCESS_KEY_ID=ACCESS_KEY_IDexport AWS_SECRET_ACCESS_KEY=SECRET_ACCESS_KEYexport AWS_SESSION_TOKEN=SESSION_TOKEN
awslocal s3api list-bucketsSignature validation authenticates a request, but does not authorize it: LocalStack does not check whether the credentials are allowed to perform the operation. Authorization is handled by IAM policy enforcement, which can be enabled independently and combined with signature validation for the closest behavior to AWS.
Pre-signed URLs
Section titled “Pre-signed URLs”A pre-signed URL grants time-limited access to an S3 object: anyone with the URL can access the object without providing credentials. You can generate a pre-signed URL as shown in the Getting started section.
Presigning is a purely client-side operation: the SDK or the CLI computes the pre-signed URL locally with the credentials it is configured with, without contacting LocalStack. The signature is only checked when the pre-signed URL is used. For the validation to pass, the URL must therefore be generated with valid credentials.
By default, LocalStack accepts pre-signed URLs with an invalid signature or an expired date.
Start LocalStack with S3_SKIP_SIGNATURE_VALIDATION=0 to validate pre-signed URLs like AWS does:
- The signature must match the request. Both SigV2 and SigV4 pre-signed URLs are supported.
- The URL must not be expired.
- All
x-amz-*headers sent with the request must be signed in the URL.
Requests that fail validation are rejected with a 403 error, such as SignatureDoesNotMatch for an invalid signature, or AccessDenied for an expired URL.
SigV4 validation
Section titled “SigV4 validation”By default, LocalStack accepts regular S3 requests signed with any credentials.
Start LocalStack with S3_VALIDATE_SIGNATURES=1 to validate SigV4-signed requests like AWS does.
LocalStack validates the signature in the Authorization header, as well as the integrity of the payload declared in the x-amz-content-sha256 header, including streamed aws-chunked uploads.
If your SDK or CLI is configured with valid credentials, validation is fully transparent and does not require any change.
Requests that fail validation are rejected with the same errors as AWS, such as SignatureDoesNotMatch for a signature computed with the wrong secret access key, or XAmzContentSHA256Mismatch for a payload that does not match its declared checksum.
Configuring Cross-Origin Resource Sharing on S3
Section titled “Configuring Cross-Origin Resource Sharing on S3”You can configure Cross-Origin Resource Sharing (CORS) on a LocalStack S3 bucket using AWS Command Line Interface (CLI). It would allow your local application to communicate directly with an S3 bucket in LocalStack. By default, LocalStack will apply specific CORS rules to all requests to allow you to display and access your resources through LocalStack Web Application. If no CORS rules are configured for your S3 bucket, LocalStack will apply default rules unless specified otherwise.
To configure CORS rules for your S3 bucket, you can use the awslocal wrapper.
Optionally, you can run a local web application on localhost:3000.
You can emulate the same behaviour with an AWS SDK or an integration you use.
Follow this step-by-step guide to configure CORS rules on your S3 bucket.
Run the following command on your terminal to create your S3 bucket:
awslocal s3api create-bucket --bucket cors-bucket{ "Location": "/cors-bucket"}Next, create a JSON file with the CORS configuration. The file should have the following format:
{ "CORSRules": [ { "AllowedHeaders": ["*"], "AllowedMethods": ["GET", "POST", "PUT"], "AllowedOrigins": ["http://localhost:3000"], "ExposeHeaders": ["ETag"] } ]}Save the file locally with a name of your choice, for example, cors-config.json.
Run the following command to apply the CORS configuration to your S3 bucket:
awslocal s3api put-bucket-cors --bucket cors-bucket --cors-configuration file://cors-config.jsonYou can further verify that the CORS configuration was applied successfully by running the following command:
awslocal s3api get-bucket-cors --bucket cors-bucketOn applying the configuration successfully, you should see the same JSON configuration file you created earlier. Your S3 bucket is configured to allow cross-origin resource sharing, and if you try to send requests from your local application running on localhost:3000, they should be successful.
However, if you try to access your bucket from LocalStack Web Application, you’ll see errors, and your bucket won’t be accessible anymore.
We can edit the JSON file cors-config.json you created earlier with the following configuration and save it:
{ "CORSRules": [ { "AllowedHeaders": ["*"], "AllowedMethods": ["GET", "POST", "PUT", "HEAD", "DELETE"], "AllowedOrigins": [ "http://localhost:3000", "https://app.localstack.cloud", "http://app.localstack.cloud" ], "ExposeHeaders": ["ETag"] } ]}You can now run the same steps as before to update the CORS configuration and verify if it is applied correctly:
awslocal s3api put-bucket-cors --bucket cors-bucket --cors-configuration file://cors-config.jsonawslocal s3api get-bucket-cors --bucket cors-bucketYou can try again to upload files in your bucket from the LocalStack Web Application and it should work.
SSE-C Encryption
Section titled “SSE-C Encryption”SSE-C (Server-Side Encryption with Customer-Provided Keys) is an Amazon S3 encryption method where customers provide their own encryption keys for securing objects. AWS handles the encryption and decryption, but the keys are managed entirely by the customer.
LocalStack supports SSE-C parameter validation for the following S3 APIs:
However, LocalStack does not support the actual encryption and decryption of objects using SSE-C.
S3 Replication
Section titled “S3 Replication”S3 Replication allows you to automatically copy objects from a source bucket to one or more destination buckets. Replication can occur within the same region or across regions, and across different accounts.
LocalStack supports the following replication configurations:
- One-way replication: Objects are replicated from a source bucket to a destination bucket. You can scope replication using prefix-based or tag-based filtering, and optionally override the storage class for objects written to the destination bucket.
- Two-way replication: Both buckets are configured as source and destination for each other, and replication is configured to work in both directions.
IAM enforcement
Section titled “IAM enforcement”LocalStack supports IAM enforcement for S3 replication. IAM permissions are evaluated in the context of each replication task using the IAM engine directly, which mirrors how AWS itself handles replication permissions.
Metadata replication
Section titled “Metadata replication”LocalStack supports replication of object metadata, specifically tags and Object Lock settings. Metadata replication operates in two modes:
- Default metadata replication: When a source object’s metadata is modified, those changes are automatically propagated to all of its replicas. This behavior is enabled by default and requires no additional configuration.
- Replica metadata synchronization: When enabled on the destination bucket, metadata changes made directly to a replica are synced back to the source object. This applies only when two-way replication is configured. See Replication for metadata changes in the AWS documentation for more details.
ReplicationStatus
Section titled “ReplicationStatus”Replicated objects are assigned a ReplicationStatus field, which you can inspect with GetObject or HeadObject.
The possible values follow AWS semantics:
| Status | Meaning |
|---|---|
PENDING |
Replication has been queued but not yet completed |
COMPLETED |
Object was successfully replicated to the destination |
FAILED |
Replication could not be completed |
REPLICA |
This object is itself a copy created by replication |
Resource Browser
Section titled “Resource Browser”The LocalStack Web Application provides a Resource Browser for managing S3 buckets & configurations. You can access the Resource Browser by opening the LocalStack Web Application in your browser, navigating to the Resources section, and then clicking on S3 under the Storage section.
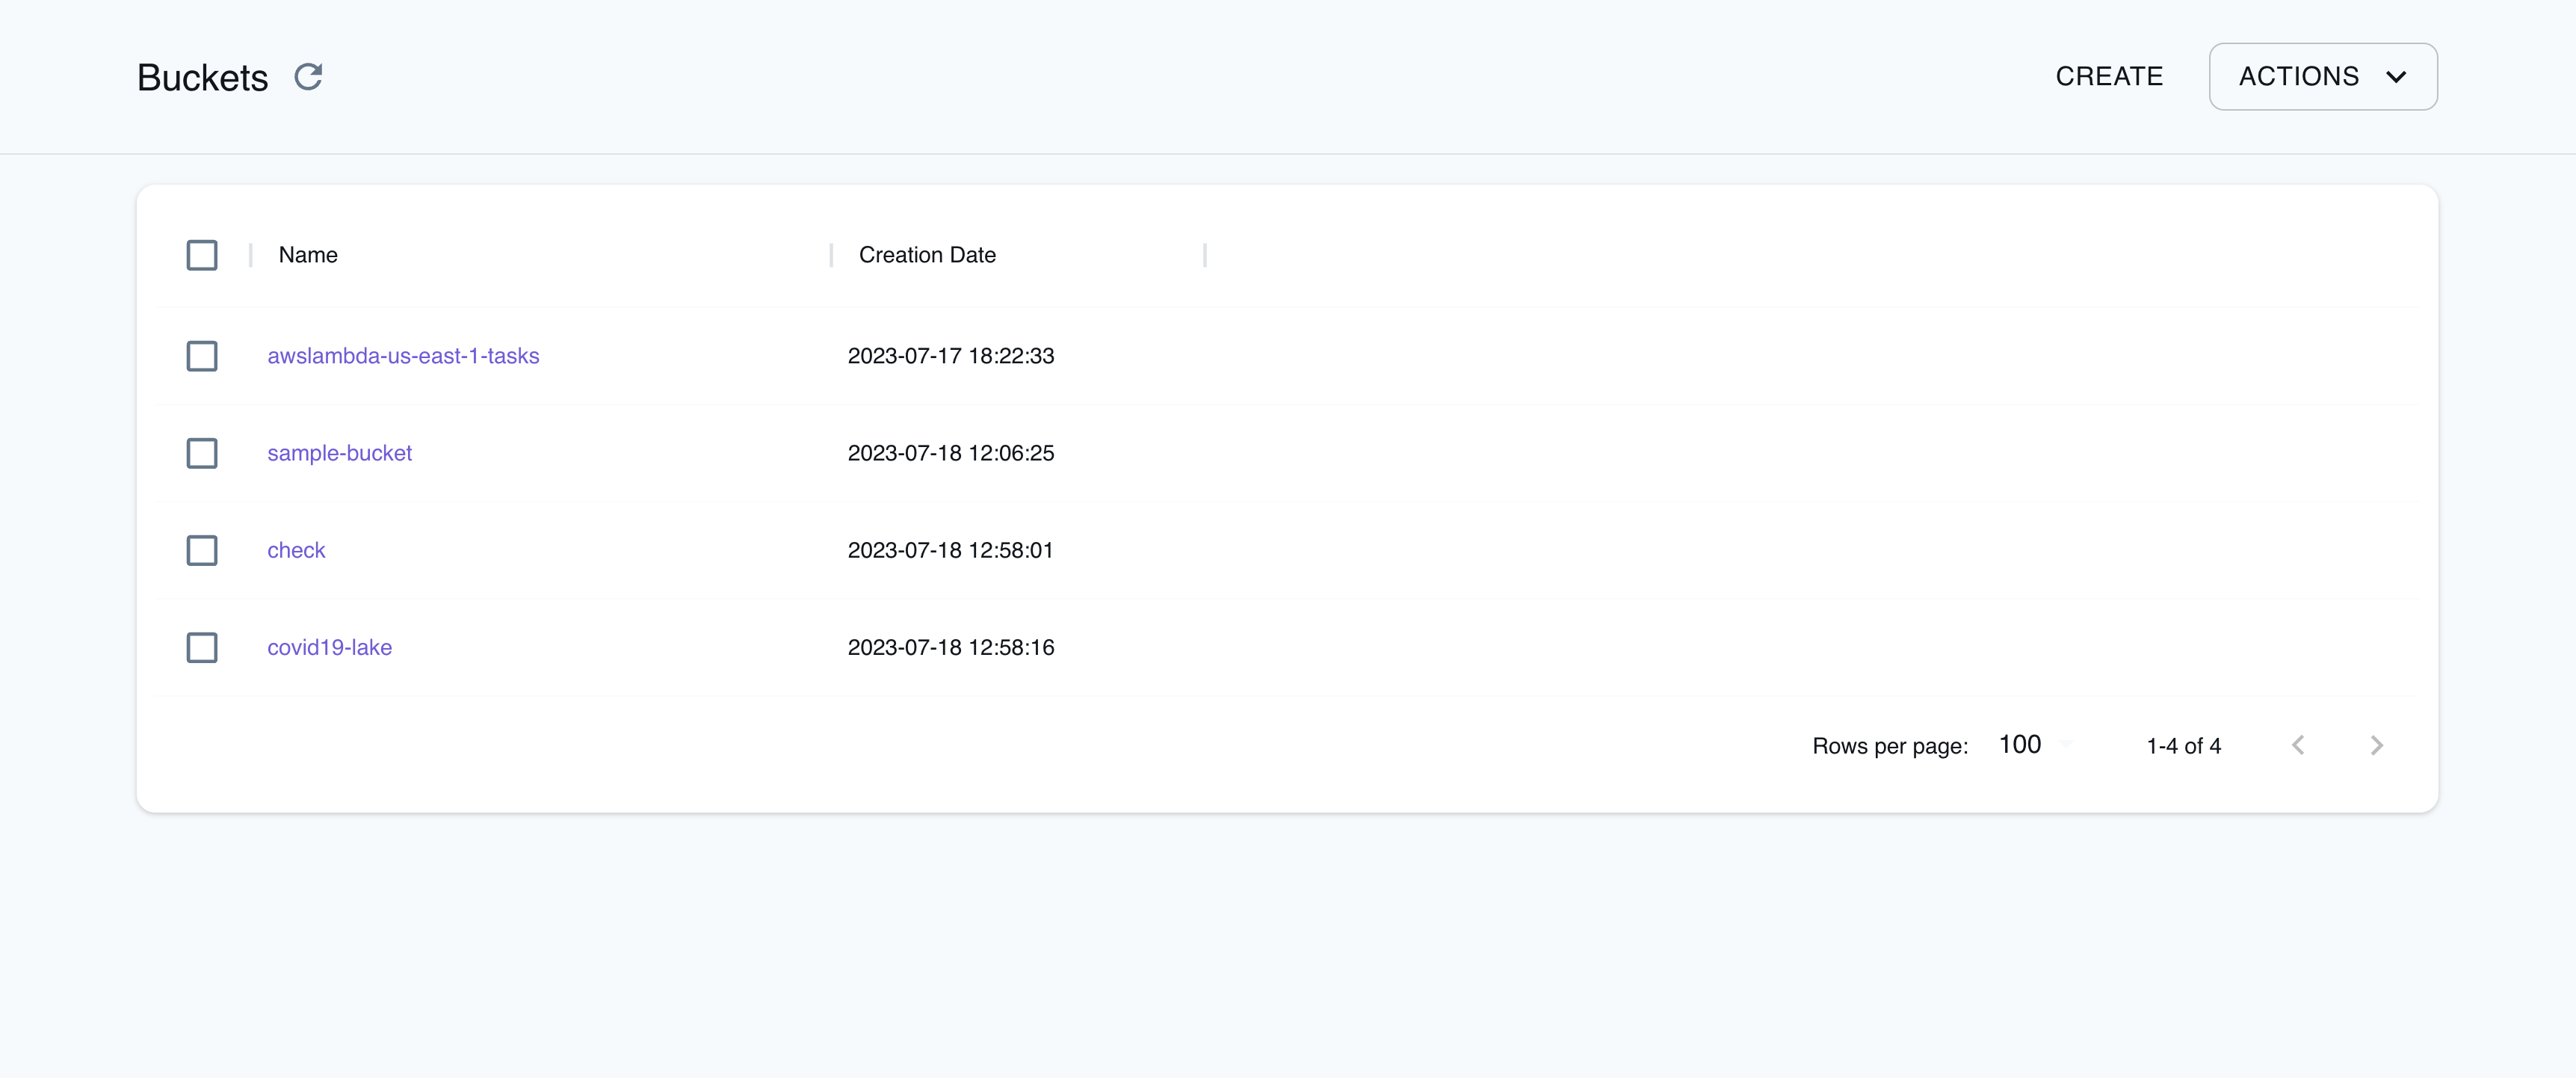
The Resource Browser allows you to perform the following actions:
- Create Bucket: Create a new S3 bucket by specifying a Bucket Name, Bucket Configuration, ACL, Object Ownership, and more.
- Objects & Permissions: View, upload, download, and delete objects in your S3 buckets. You can also view and edit the permissions, like the CORS Configuration for the bucket.
- Create Folder: Create a new folder in your S3 bucket by clicking on the Create Folder button and specifying a Folder Name.
- Delete Bucket: Delete an S3 bucket by selecting the S3 bucket and clicking on Actions button and clicking on Remove Selected.
Examples
Section titled “Examples”The following code snippets and sample applications provide practical examples of how to use S3 in LocalStack for various use cases:
- Full-Stack application with Lambda, DynamoDB & S3 for shipment validation.
- Serverless Transcription application using Transcribe, S3, Lambda, SQS, and SES
- Query data in S3 Bucket with Amazon Athena, Glue Catalog & CloudFormation
- Serverless Image Resizer with Lambda, S3, SNS, and SES
- Host a static website locally using Simple Storage Service (S3) and Terraform with LocalStack
API Coverage
Section titled “API Coverage”| Operation ▲ | Implemented ▼ | Verified on Kubernetes |
|---|
API Coverage (S3 Control)
Section titled “API Coverage (S3 Control)”| Operation ▲ | Implemented ▼ | Verified on Kubernetes |
|---|